Peplink Settings to Get Started
Peplink offers many features in their mobile routers that set them apart from other mobile router options on the market.
But this can also be a little daunting when you first get started. In this guide, we'll help you set up your router for mobile internet use. The settings we cover in this guide are:
- Set up your Time Zone
- Establish a LAN Network, Adding a SpeedFusion Dedicated Network, Adding Guest Network
- Enable SpeedFusion Cloud (optional for customers with more than 1 connection, remote work needs)
- Configure Wi-Fi Network (s)
- Primary Network
- SpeedFusion Network
- Guest Network
- Configure Outbound Policies
- Configure Bandwidth Management/QoS
- Saving Changes, Backup Config & Share!
For more on Peplink products, see our full Peplink Resource Center:
This Resource Provided by MMH & MIRC
This Peplink resource article has been created in partnership with MobileMustHave.com, and parts may be offered as a free public resource with additional in-depth content available exclusively for our premium members.
The Mobile Internet Resource Center is proud to be partnered with MobileMustHave.com offering the education, news and guidance on mobile Internet options for RVers and boaters. Here at MIRC, we don't accept advertising, sponsorships and nor do we sell stuff.
Please consider becoming a member to go deeper with our content. Including Peplink discounts, webinars and advanced technical support provided by MobileMustHave.com.

MobileMustHave.com offers their Insider memberships, which include access to Mobile Internet Resource Center. You can also join MIRC directly for a lower cost if a MMH purchase is not in your future. You'll still get vendor discounts & Peplink tech support.
Consider Becoming a Member
If mobile internet is an important part of your lifestyle, a MobileMustHave membership (which includes membership to this website) can help keep you connected with these exclusive benefits:
- gear and data plan discounts
- member exclusive deals
- advanced replacement
- upgraded shipping
- in-depth exclusive content
- interactive guidance & community
- alerts & insider tips
- Peplink technical support
Peplink Getting Started Initial Settings Video
Here's our video where MIRC founder Chris and Erik of MobileMustHave discuss setting up a Peplink router from scratch. Watch this video to follow along working through the settings described in this guide.
Introduction
This guide will help you configuring your Peplink router for mobile internet use.
In the conclusion we share the configuration file of the device (as configured in the video and described here) so that you can easily apply the sample configuration to your own router. However, if you are new to Peplink we encourage you to follow along on your own device to build familiarity with your Peplink options and controls.
Compatible Peplink Devices
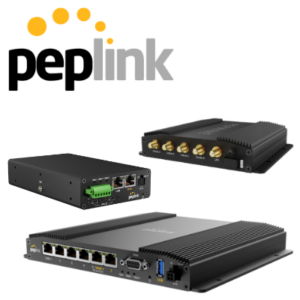
In the video we configured a MAX BR1 Pro 5G but this configuration file works with any Peplink device including popular models:
- Peplink BR1 Mini
- Peplink Max Transit
- Peplink BR2
- Peplink B One and
- Peplink B One 5G
- and others.
First Steps

The very first steps are as follows.
- Remove the device from the box - make note of the default network name and password on the label on the bottom.
- Attach any included paddle antennas to the device
- Plug the device into power, and wait for the green lights to appear!
- Insert an active sim card (if it has a sim slot)
- Connect a computer/tablet to your device via WiFi or LAN. You can do this with a phone, but it's likely much easier with a full keyboard.
- Open the device's admin page
- To get to the Admin page: open a browser window and enter the device's IP address (on the bottom of the device) - typically 192.168.50.1 is the default IP address.
- Log into the admin, and reset your password (Peplink will make you do this) (And make sure to save this password somewhere you can find it!)
- Change your device's Wi-Fi password (Peplink will make you do this). You will be disconnected from the device once you change your password.
- Now reconnect to your device again via Wi-FI and enter in the new WiFi password you just created.
- Log back into the Admin page with your new admin password.
- Erik made a video on how to do these steps: https://youtu.be/_9LfDnECWq4
- Update the firmware to the latest version
- We have a video for this here: https://youtu.be/bulhAcgLaAQ
If you are following along the video, note that Chris and Erik have already set up a Wi-Fi as WAN connection in their example router so that they could film and show the device's screen. You do not have to do this to complete the initial settings for mobile internet.
But if you'd like to, here are some instructions: https://youtu.be/Bg8iN5tXfLQ
How to use this Guide
Now that you have created new passwords and logged into your device you can get started with some basic settings.
One of the advantages of a Peplink is that you can save your configuration and always reinstall a previous configuration should you decide you do not like your changes.
For this guide we will be making changes in five different tabs when you are logged into your Peplink Admin role: SYSTEM, NETWORK, ACCESS POINT, SPEEDFUSION CONNECT, and ADVANCED.
The shorthand for describing what we are doing for each configuration change is
- TAB --> LEFT MENU OPTION - MAIN SCREEN OPTION/Field
For example "System Tab --> Time - Set Time Zone " tells you to select the System Tab, select "Time" on the left menu and go to the Set Time Zone row on the main screen.
Note that as you go along you will get reminders from Peplink screen to apply the changes, but for now you can ingore them until the end (or when you get to a stopping point) of these instructions. Peplink will save your progress.
We recommend waiting until it's all completed before applying your changes. This is because some of the changes you make can result in logging you out of the Peplink device!
Along the way we have links to more detailed guides on how to get the most of some of the features we set up. If you are new to Peplink, we suggest going through the basics setups here, and then return to the more advanced guides when you are ready.
Peplink offers a lot of amazing options, but this guide should get you started and give you a little insight into what else you may want to do in the future.
System Tab
First we will open the System Tab to set the time zone. Having the correct time zone will help when/if you need to check the system log.
- SystemTab --> Time - Set Time Zone
The System Tab is also where you can enable or disable InControl2.
InControl2 is a cloud based tool to manage your device remotely. Incontrol2 is also helpful if you forget your admin password.
- System Tab --> Incontrol - Controller (disable if your never going to use it)
Your PrimeCare includes one year of InControl2, so you may want to look into more about this feature. For more information on InControl2 see our guide:
Network Tab
Sometimes it's really helpful to control how different devices or users access the internet. You can do this by creating different networks to connect to. We have a dedicated Peplink guide on using Virtual LANs to manage your internet access.
But to get you started, we will set up some common network and port options many Peplink nomads will use.
Renaming the Default Network
In the network Tab, you have a Left Menu with "LAN" and "WAN" options. In the LAN option the first Network you will see is "Untagged Network". You can rename this to something more helpful, like "Primary Network" or "Main Network", as you will need to refer back to this name.
- Network Tab--> LAN Network Settings - Name (rename it to Primary or Main Network)
Connecting with Starlink
If you have Starlink and want to connect your Peplink device to Starlink you will want to enable the Starlink Controller setting.
- Network Tab --> WAN - Starlink
Reconfiguring a WAN Port to LAN
In the LAN Port Setting you can assign one of your device's Ethernet WAN ports to become a LAN port. This can be handy to connect devices that may not connect via Wi-Fi, like a security camera or printer or a network switch that connects many other things togerher.
- Network Tab --> LAN Port Settings - WAN
Creating New Networks
Peplink lets you create mulitple networks that you can control and manage their behavior and performance individually. It's important to remember which IP address you assign to each network because you will need those when you are later managing their properties.
In addition to the Primary network you just re-named, we are going to create two additional networks; one for SpeedFusion, which is going to be for your highest priority device use (use for work etc), and the second being a guest network to share internet without putting your own information at risk.
You may eventually decide to create even more networks, like one for streaming devices, one for the kids, etc. But let's start with SpeedFusion and Guest Networks.
Creating a Speedfusion Network
To create a SpeedFusion network, you click the "New LAN button" found in the topmost box in the LAN Network Settings. Then in the new window's top box you add a new IP Address (e.g. 192.168.51.0). In the second box ("Network Settings") give it a name (e.g. SpeedFusion Network) and a VLAN ID (e.g. 2). In the third box ("DHCP Server) tell the router to assign IP range (eg "192.168.51.10" to "192.168.51.240"). And leave all other settings unchanged.
- Network Tab--> LAN Network Settings - LAN - New LAN
- IP Address: 192.168.51.0
- Newtork Settings
- Name: SpeedFusion Network
- VLAN ID: 2
- DHCP Server
- IP Range: 192.168.51.10" to "192.168.51.240"
Write down & keep handy the IP address you gave the SpeedFusion Network.
Creating a Guest Network
Sometimes you want to allow guests access to the internet, but you do not want them to have access to other information that is on your main network. A guest network lets you control their access.
In the Network Tab, you can create a new Local Area Network (LAN). You will create a new IP Address (e.g. 192.168.53.0). Then in the "Network Settings" box, give it a name (e.g. Guest Network) and a VLAN ID (e.g. 3), unselect "Inter-VLAN routing", and tell the router to assign an IP range (eg "192.168.53.10" to "192.168.53.240").
- Network Tab --> LAN Network Settings - LAN - New LAN
- IP Address: 192.168.53.0
- Newtork Settings
- Name: Guest Network
- VLAN ID: 3
- unselect "Inter-VLAN routing"
- DHCP Server
- IP Range: 192.168.53.10 - 192.168.53.240
The most important step for a guest network is to unselect the Inter-VLAN routing to make sure they don't have access to your whole network. There are other things you can do with guest networks that we cover in our guide.
Write down & keep handy the IP address you gave the Guest Network.
More Resources
For more information on virtual WAN, virtual LANs, Guest Networks, and using Starlink and Peplink together, see our guides:
Access Point (AP)
Enabling External Access Points
You may have other external Peplink Access Points you wish to control with your Peplink router. To do this you will use the AP, or Access Point, tab.
If you turn on the Access Points, it will find devices and automatically connect. You can enable External Access Points now even if you do not have any external devices you need to connect right now.
- AP Tab--> Wireless SSID - AP Controller - AP Management - toggle External AP
These Access Points can extend your Wi-Fi network range - especially handy on large RV's or yachts.
Or you can just use the Access Point built in to your router if you do not need the benefits of an external AP.
Creating a Wireless Network
This section walks you through creating Wi-Fi connections for your various devices to connect to.
We are going to set up three Wi-Fi connections - the primary one, a SpeedFusion one (that we will configure to use SpeedFusion later), and a Guest one. You'll note that these correspond to the number of networks we created earlier.
For "SSID" you create a text name for your wireless network (e.g. "Smith Family"). You can schedule it to be always on, and you tell it which virtual network to use (e.g. Primary Network, Speedfusion, Guest...). Set to Broadcast the network so you can find it. In the next box you set the security policy you wish to use. We recommend WPA2 or WPA3 (not WPA/WPA2 option). Finally, in the Shared Key row you add your password.
- AP Tab -> Wireless SSID - New SSID
- SSID: type in the name you want to see in your WiFi options (e.g. Smith Family")
- Network: choose Primary
- Broadcast: yes
- Security Policy: WPA2 or WPA3
- Shared Key: create a password
You will repeat these steps to set up wireless networks for each of your networks you created earlier - Guest, Speedfusion, etc.
AP -> Wireless SSID - New SSID
- AP Tab -> Wireless SSID - New SSID
- SSID: "Smith Guest" or similar
- Network: Guest
- Broadcast: yes
- Security Policy: WPA2 or WPA3
- Shared Key: - create a password - suggest something memorable, like your phone number etc
- AP Tab -> Wireless SSID - New SSID
- SSID: "SpeedFusion"
- Network: Speedfusion
- Broadcast: yes
- Security Policy: WPA2 or WPA3
- Shared Key: create a password
Finally, you will want to delete the factory SSID
- AP Tab -> Wireless SSID -> Delete Factory SSID (NOTE: if you apply changes now you will be logged out and have to log in using one of the new WiFi connections you just created).
Setting up Wireless Mesh (Optional)
To set up a wireless mesh to connect to an external AP over Wi-Fi instead of Ethernet to expand your network range:
- AP Tab -> Wireless Mesh - "Add"
For Mesh ID use a text name (e.g. Smtih-Mesh-5G), toggle the frequecy you want (5GHz, 2.4 GHz or both), and create a password (AKA "Shared Key").
More Resources
For more information on Access Points see our guide
SpeedFusion Connect Tab (SF Connect)
SpeedFusion is a primary feature of Peplink. It allows you to combine multiple upstream connections (Wide Area Networks or WAN) to have enhanced speed and reliability. This lets you use your Starlink with your cellar and/or campground WiFi together seamlessly.
In this guide we will manually create a SpeedFusion Tunnel. Note that Peplink has "wizards" to help you do this, but they have the potential to miss settings/features you would want to have.
Starting on the SpeedFusion tab's main window you have several buttons. Click the topmost one "Client Mode for Outbound Access", which will pull up a new screen.
Here you have a drop down menu for Choosing SFC Location, you can select Automatic and the device will chose one for you. There is also an option to check the latency of available SpeedFusion cloud locations by clicking a link below the box. Once you have selected your location, click the green checkbox to finsh creating it. It's still not being used however, that is in the next section.
- SF Connect Tab - Client Mode For outbound Accesses
- Set location from Dropdown (suggest automatic to start)
- Click the green checkbox on the right: this will cause the newly created one to appear on the list
For more information on using SpeedFusion, See our guide:
Advanced Tab
For this last tab, Advanced, we are going start binding these networks to behave in specifc ways.
For mobile internet in particular, you may want to control certain traffic to use specifc internet sources, such as forcing video streaming to your Starlink. You can also limit bandwidth, control content or prioritize certain applications over others.
We are going to do a just few basic things here in this guide.
Outbound Policies to Control how Networks Connect to the Internet
Outbound policies is where you set how to connect to the internet, and you can use these to control specifc networks. Here is how you set your outbound policies.
The first policy to check and be aware of is the Default Policy. For now the settings are probably fine, but know that you can change them in the future. Here is how you find your default outbound policy:
- Advanced Tab -> Outbound Policy ->
- Default:
- Default is load balance, which may be fine or cause issues depending on needs
- Your Peplink will mix and match multiple connections as it sees fit, or you can force it to specific connections
- Consider priority, weighted balance, or just leave default for new users
- Default:
We are also going to create a rule for our SpeedFusion network's connections.
- Advanced Tab -> Outbound Policy ->
- Click "Add Rule:
- Service Name: SpeedFusion Policy
- Enable: on
- Source: IP Network 192.168.51.1 (use same IP as how you defined SpeedFusion Network earlier)
- Destination: Any
- Protocol: Any
- Algorithm: Enforced
- Enforced Connection: SFC: SFC
- Click "Add Rule:
A more advanced Algorithm would be to set it to "Priority". This brings up options that shows all your connections. You will need to add SFC to Priority 1, and toggle on "terminate sessions on Recovery".
Finally we will create rule for our Guest network.
- Advanced Tab -> Outbound Policy ->
- Service Name: Guest Policy
- Enable: on
- Source: IP Network 192.168.53.1 (use same IP as how you defined Guest Newtork earlier)
- Destination: Any
- Protocol: Any
- Algorithm: Priority (now drag your connections to the priority order you want, or remove connections)
- When No Connections Available: Drop the traffic
- Terminate Sessions: Enabled
For more information on outbound policies, see our guide:
QoS Policies to Manage Bandwidth and Set Priorities
QoS or Quality of Service is where we can manage bandwidth and set priorities for different types of traffic or networks.
The first one we will set up is for the guests. First we will create a user group called Guest.
- Advanced Tab-> QoS -> User Groups -> QoS Clients -> New Rule
- Group by: Subnet 192.168.53.0 for Guest (use same IP as how you defined Guest Newtork earlier)
- User Group: Guest
- Save
Next we establish bandwidth control for this new user group (Guest). Here you can set limits for upload or download, so that they don't take over all your bandwidth.
- Advanced Tab -> QoS -> Bandwidth Control - Individual Bandwidth Limits
- Enable
- Guest
- Download: 5 Mbps
- Upload: 2 Mbps
- Save
Another helpful Quality of Service setting is we can ensure voice applications get priority over other applications. This will help performance with Zoom and other applications that use voice over IP.
- Advanced Tab-> QoS -> Application -> Add
- Category: VoIP
- Application: All Supported VoIP
- Priority: High
- Click OK
We can also optimize our Speedfusion VPN traffic. Prioritizing this network over others makes sense because this is probably where your most important network traffic will flow.
- Advanced Tab-> QoS -> Application
- SpeedFusion VPN traffic Optimization -> ENABLED
- Click Save
For more information on Peplink Quality of Service Policies, see our guide:
Firewalls to Control Content and Activities
The last option in our Advanced Tab that you may want to implement right away is blocking content for children or other sensitive networks.
- Advanced -> Firewall -> Content Blocking
- Can limit adult content, P2P file sharing, and many other things
- Can identify networks that are exempt from these policies.
Wrapping Up
Now that you have made your initial settings, it is time to click the "Apply Changes" button.
Do remember that if you deleted the default WiFi network (SSID), you will be kicked out and have to log in again using one of your newly created Wi-Fi network's name.
If you return to the Dashboard Tab you can now see all your connections and settings.
Lastly, since you have created a wonderful baseline, now is a great time to download your currect configuration!
- System Tab -> Configuration -> Download Current Configuration
You can keep this handy for when you wish to restore this set up.
As promised, here is the configuration file created during the video described above. (Note that Erik did not save the guest network controls that are described above, so somethings are a little different).
View our Peplink product line overview and articles - co-authored with our education & action partner at MobileMustHave (who offers advanced support, guidance and discounts to our members):
Explore the Resource Center
Have Questions?
Join our 'Library Desk':
Internet for RVers & Cruisers Facebook Group
We cross post news articles and guides, and can help point you in the right direction to our content here on the resource center.
It is with gratitude to our premium members that we're able to offer our free content - and for that, they also have access to our member Q&A areas for more in-depth guidance.
Become a Member
 The MIA is our premium membership - designed for those who consider mobile internet an important part of their lifestyle.
In thanks for making content like this possible, we offer a bunch of additional perks. From interactive guidance, in-depth member exclusive content, discounts, alerts, classroom and ability to book private advising sessions.
Stay In the Know
We're constantly tracking the industry and analyzing new developments for mobile travelers. If you'd like to receive updates, we offer several ways:
- Subscribe to our free monthly newsletter
- Subscribe to our News Stories RSS Feed
- Subscribe to our YouTube Channel
- Follow our Facebook Page
 These resources are co-authored with our education & action partner at




 Mobile Internet Resource Center (dba Two Steps Beyond LLC) is founded by Chris & Cherie of